29 November, 2011

Polymer Clay Bacon!

Last Christmas Aaron and I acquired our first Christmas tree yet had no ornaments to offer our magnificent evergreen.  It was ingrained by my childhood that a tree should be filled with homemade ornaments so we threw together a small decorating party where I pulled out my craft stash, popped popcorn to string and put some cider on the stove.  The party was a success and I couldn't imagine a better dressed tree complete with a homemade space-themed tree skirt.  I think my favorite adornment was the Reptar-esque, pipe cleaner tree topper.


Another favorite was a creation of my own, polymer clay bacon!  Super quick, super easy, and in my opinion, pretty ingenious as clay food goes.  Today I'll show you how to make your very own to give to the bacon lover in your life this holiday season.


Materials:
*  red, burgundy, and white polymer clay
*  something to roll the clay out, ex: rolling pin, pint glass
*  a straw or pen tube


Step 1.
After softening up your clay start rolling out "snakes".  This is easily done by rolling a piece of clay against the table with the palm of your hand.  I'm pretty sure most of us mastered this technique in preschool.  Note the width of the snakes, you'll be smashing them flat so you don't want them to be too thick.  Also I recommend variation in the thickness to add more character to your bacon.

Tip:  Work with the white clay first since the red clay leaves red residue on your hands!


Step 2.
Line your snakes up side by side mixing lengths and colors.  Press them gently together as you go, you don't want to smash them into each other too much, the next step will take care of that.


Step 3.  
Use your rolling/flattening apparatus (I used a very sophisticated tool, a pint glass)  to roll your piece flat, you'll roll it back and forth a few times to your desired thickness.


Step 4.
Cut the length of bacon you want, trimming the ends and so forth.  I cut mine in half to make two pieces but all this depends on how long you made your snakes in the first place.


Step 5.
Use your straw or pen tube to put a hole at one end of your bacon.


Step 6.
Give them some waves!  Don't be too hard on them but use your fingers to create body.


Step 7.
Bake your bacon according to the directions of your clay package then string your work on yarn, ribbon, jute, etc. and hang it on your tree! I unfortunately don't have a tree this year so it will be gracing my wall.


Pretty easy huh?  And it would be super easy to make a bunch of these all at once.  Happy Holidays!

16 November, 2011

Huevos Rancheros

I worked for 4 years at a restaurant in Blacksburg, VA where they serve the best breakfast in town.  Gillie's offers a multitude of tasty dishes and we try to recreate some of them here at home.  Today I am going to tell you how I make their version of Huevos Rancheros.  It's super easy and we usually have all the ingredients on hand.

Huevos Rancheros

Ingredients:  The amount of each ingredient varies from person to person, are you a cheese fiend or do you like dousing things with salsa?  Just use your own judgment, we're all adults here  with decision making skills.
1. Tortilla Chips
2. Eggs - I sometimes use as few as 1 or as many as 3 depending on how hungry I am
3. Shredded Cheese - any cheese you like, we use pepperjack most times but I also enjoy a good sharp white cheddar 
4. Salsa

Step 1: Start with a layer of tortilla chips and add your shredded cheese on top.  Sometimes I'll put a layer of chips, layer of cheese, more chips and finally more cheese so that the cheese is distributed evenly (I'm part of the cheese fiend category).  

Step 2:  If you're using the microwave just pop it in for 15-30 seconds or until the cheese is melted.  Every microwave is different so just keep an eye on it and don't over do it or else the cheese and chips will get weird, you know what I mean.

I don't own a microwave so I just pop it in the toaster oven in the oven safe dish shown in the pictures.  You can even use a conventional oven and if you're making multiple servings you could use a cookie sheet and divvy the chips and cheese onto separate plates afterwards.

Step 3:  While the cheese is melting start cooking your eggs.  I prefer them over easy because then the yolk oozes all over everything and is AMAZING but people used to order them every which way, sunny, over hard, even scrambled.

Step 4:  When the eggs are done put them on top of the chips and cheese.

Step 5:  Top with salsa and you're done!  Sometimes I warm up the salsa and sometimes I just put it on straight from the shelf, it usually depends on how hungry I am.

Spice it up a bit:
At gillies they would offer the addition of spicy breakfast beans.  I've found chili to be an easy and delicious substitution.  My personal favorite is to spruce it up with pressed garlic, fresh spinach, and sauteed mushrooms. Yummo!

I hope it's as good for you as it was for me!

15 November, 2011

More Chevrons?

Can you have enough pillows or chevrons?  Probably not.

I whipped up this pillow and finished it today.  It's made with Lion Brand's Thick and Quick Wool-Ease which is a bulky acrylic/wool blend.  They aren't kidding when they say quick, crocheting the front was a breeze with a size N/9.00mm hook. I then attached 2 layers of felt fabric, the outside layer with an overlapping slit so the pillow can be removed and the cover washed.  All three layers together were pretty thick so I decided to just hand sew them which probably took as long as the crocheted part.


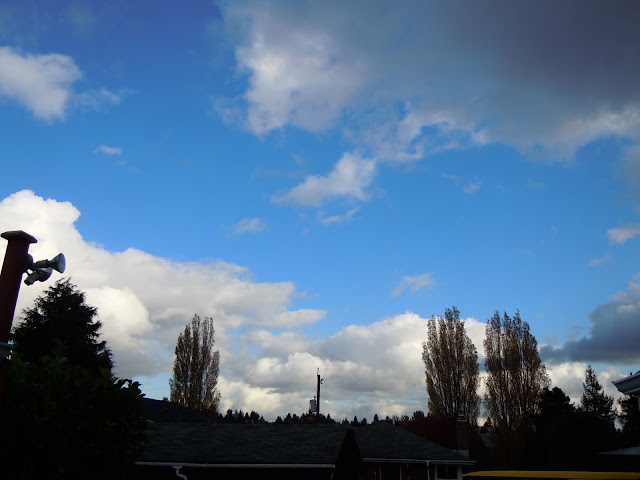
I would like to make another but crochet all the way around and use more than 2 colors, a rainbow or monochromatic pillow with different shades?  I've been thinking about blues after seeing this scarf where you knit a line every day with the color of the sky.  I think its a beautiful idea and will make a great addition to my to-do list.  Summer would be blocks of blue and winter shades of white and grey. What if you were so dedicated that you did an afghan or blanket?  It might be neat to frame a small version as well.  Here's the Seattle sky today, I think it warrants bright blue and white.  It's not always raining here, at least not yet.


14 November, 2011

On Books and the Seattle Public Library

I've been thinking a lot about books lately.  Books are my comfort food when I'm having a bad day.  In a different period of my life when I had lots of bad days I would often go to the bookstore and for hours I would leaf through books in just about every section deciding which one I should take home with me.  These days I spend a lot less time at the bookstore and most of the volumes I add to my library come from thrift stores where you can pick up a number of fine books for only $1.  This propensity to buy books and the addition of Aaron's collection has left me with many that I own and have yet to read.  When moving across the country Aaron and I shipped our library of 11 boxes averaging 40lbs a piece through media mail.  Yesterday, after 6 months in storage, we finally opened the boxes and gave our books a home.  Now they're in every room of our little house, in shelves under the bed, behind dvds in the living room,  stacked 2 and 3 deep on a built in shelf and our collection of cookbooks reside in the kitchen of course.  It's nice to have them available again even if they're a little unorganized  I have just begun to undertake the task of cataloging them all with the help of the Good Reads smart phone app that allows you to scan bar codes and automatically add them to your Good Reads bookshelves.  I think it will be nice to have a digital reference to our collection.


What started all these thoughts on books was a trip to the main branch of the Seattle Public Library.  It is  a sight to see and is most certainly worth a visit.  The building was designed by engineers and architects with the idea that form should follow function.  You can follow this link to see an interesting Ted Talk about its design and construction and take a quick virtual tour of the building.  I've been told that Seattle's library system is very good and I am looking forward to testing it out especially since we have 2 branches within walking distance.


One of the coolest aspects of the library is that the books are arrangedin linear numeric order by use of a spiral with a slightly sloping floor.  Kind of like a parking garage for books.  This form of organization makes it very easy  to navigate as it is very intuitive.  And if you don't want to walk through the entire spiral there are stairs that serve as shortcuts to different levels.


I'll conclude this tangent on books with a quote from one of the most quotable men who ever lived.  It comes from an episode of The Cosmos we watched the other day that happened to have  a section about books.  I love how Carl Sagan reminds us of the wonder of everything around us if only we stop to think on it.

“What an astonishing thing a book is. It’s a flat object made from a tree with flexible parts on which are imprinted lots of funny dark squiggles. But one glance at it and you’re inside the mind of another person, maybe somebody dead for thousands of years. Across the millennia, an author is speaking clearly and silently inside your head, directly to you. Writing is perhaps the greatest of human inventions, binding together people who never knew each other, citizens of distant epochs. Books break the shackles of time. A book is proof that humans are capable of working magic.”
-Carl Sagan, The Cosmos: A Personal Voyage, Episode 11: The Persistence of Memory


07 November, 2011

Cute-as-a-Button Mushroom

In honor of our Wild Mushroom Show visit I wanted to crochet a quick mushroom.  Although  inspired by the variety of shapes at the show I stuck with the good old button mushroom for my first stab at fungal amigurumi.  It was quick and easy and oh-so-cute, 3 characteristics which beg for a repeat.  So I did . . . repeat . . . 4 times!  A rainbow of adorable mushrooms!  This project is an easy way to use up extra colorful yarn laying around.


Cute-as-a-Button Mushroom Crochet Pattern


Materials:
worsted weight yarn (2 colors, one for base and one for cap)
size F/3.75mm hook
safety eyes (optional)


Stitches used: 
chain (ch)
single crochet (sc)
double crochet (dc)
front post double crochet (fpdc)
decrease (dec)


Start with a magic ring.
1:   sc 6 into the ring, pull tight
2:   2 sc in each sc (12 stitches)
3-10:   sc around 8X's (96 stitches)
          Tip: Change the number of repeats to lengthen or shorten your stem!
11:  ch 2 (counts as dc), fpdc in same, *(dc in next, fpdc in same) repeat  from * another 10X's
       join to top of ch 2
          Tip:  Row 11 sounds weird but it is really quite simple, just fpdc in every stitch and insert a dc between             each one.  You'll end up with 12 fpdc and 12dc (counting the initial ch 2 as a dc of course).  You'll be                 doing the same in the next row (Row 12) into every dc and fpdc resulting in 24 fpdc and 24 dc.
12:   ch 2 (counts as dc), fpdc in same, *(dc in next, fpdc in same) repeat from * another 22X's
         join to top of ch 2
13:   Switch to cap color.  ch 1, sc next 47, join
14:   ch 1 sc in backloop 0f next 47,  from here you'll be working in a spiral so no need to join or chain up
15:   sc in next 48
16:   (sc in next 4, dec) 8X's
27:   sc in next 40
28:   (sc in next 3, dec) 8X's
stuff stem firmly
29:   sc in next 32
30:   (sc in next 2, dec) 8X's
31:   (sc in 1, dec) 8X's
stuff cap
32:   (sc 1, dec) 6X's
finish stuffing
33:   decrease until closed, finish and weave in end


If you have any problems with the pattern just let me know and I will try to fix anything that's unclear.  There are so many different methods to expressing a crochet pattern and I'm working out my kinks and trying to find my style.  Happy crocheting!